
A circular saw that deviates by a few millimeters on a melamine panel produces an irrecoverable edge. The straightness of a cut depends less on the power of the motor than on three mechanical factors: the stability of the base on the material, the lateral guidance of the blade, and the depth of penetration into the wood. Mastering these three parameters transforms a rough cut into a clean line, without the need for touch-ups.
Blade Depth Adjustment: The Parameter Most Commonly Associated with Failed Cuts
Before marking anything, adjust the cutting depth. The blade should just exceed the thickness of the material, no more. An excessive protrusion increases the contact surface between the teeth and the wood, generating lateral vibrations and promoting the rebound phenomenon.
To adjust correctly, place the unplugged saw on the workpiece, unlock the depth lever, and lower the base until the teeth protrude half a tooth below the underside of the panel. Lock it firmly again. This adjustment also reduces fiber tear-out at the cut exit, as the attack angle of the teeth remains shallower.
Learning to cut straight with a circular saw starts with this habit: adjusting the depth with every change of material or thickness. A few millimeters of plywood and a laminated worktop do not tolerate the same setting.
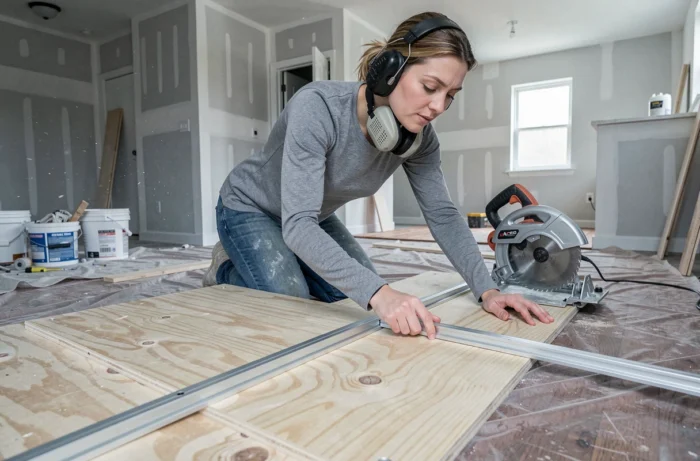
Cutting Guide for Circular Saw: Rail, Ruler, or Batten
Lateral guidance is what distinguishes a straight cut from a “roughly straight” cut. The base of the circular saw slides against a reference edge, and it is the straightness of this edge that determines the straightness of the line.
Manufacturer’s Guide Rail
Manufacturer’s rails (compatible with a specific brand) offer an integrated anti-tip system. The base fits into a groove, preventing any lateral offset. For long cuts on panels, this is the most reliable solution for lateral guidance.
Aluminum Ruler or Straight Batten
An aluminum ruler of the “straight edge” type fixed to the material with two clamps works very well, provided you measure the gap between the edge of the base and the blade. This gap (often called “offset”) must be accounted for when positioning the ruler relative to the cut line.
A planed hardwood batten can replace the aluminum ruler. Check its straightness by placing it on a flat surface: any visible gap between the batten and the surface means a curved cut at the end.
- Measure your saw’s offset once, mark it on the base with a marker so you don’t have to recalculate it.
- Always secure the guide with at least two clamps, one at each end, to prevent pivoting during the cut.
- Place the guide on the side of the piece to be kept: if the saw deviates, it’s the waste that absorbs the error.
Push Technique and Body Position During Cutting
Positioning yourself off the blade’s axis is a safety measure against rebound, but it’s also a factor for precision. When the body is offset, both hands apply consistent pressure forward and against the guide, without unwanted twisting on the machine.
The front hand holds the auxiliary handle and keeps the base pressed against the ruler. The rear hand pushes the saw at a constant speed. A too-fast feed forces the teeth and creates heat that causes the blade to deviate. A too-slow feed burns the wood and clogs the teeth.
The right rhythm can be recognized by the sound: a steady, low whistle indicates that the blade is working without forcing. A change to a high-pitched tone signals an emerging jam. In this case, keep the saw running, stop advancing, and let the blade spin in place for a second before resuming.
Checking the Lower Guard Before Each Cut
Before plugging in the saw, manually retract the lower guard and release it. It should return to the closed position freely and smoothly. A guard that sticks (due to resin residue, compacted sawdust) may remain open during the cut, exposing the blade and altering the base’s support on the material. Clean it with a cloth soaked in degreaser if the movement is not smooth.
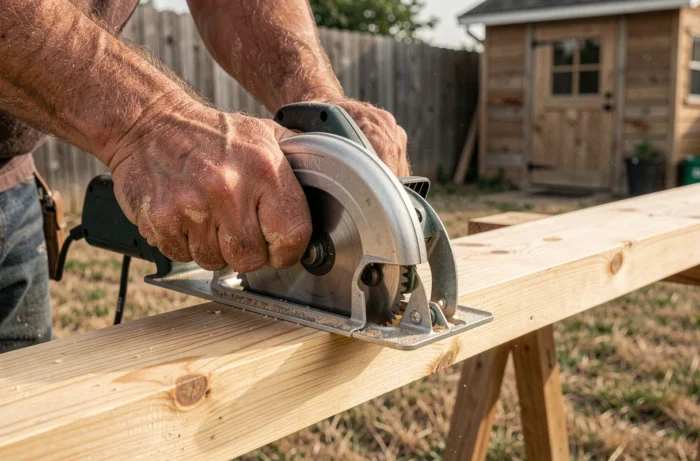
Dust Management and Visibility of the Cut Line
Fine dust, especially on particle boards and MDF, obscures the pencil line after just a few centimeters of progress. Some saws incorporate a blower designed to clear the cut line, but on compact models, this blower is sometimes ineffective or poorly directed.
Connecting a vacuum to the saw’s dust port solves the problem at the source. If your model does not have a compatible port, adapters are available for most common diameters. A constantly visible cut line eliminates the temptation to lift the saw to check its trajectory, a gesture that almost always causes a shift.
For cuts where suction is not available, mark your line with a utility knife rather than a pencil. The incision in the fibers remains visible despite the dust and limits tear-out on the upper edge of the cut.
Choosing the Blade According to Material and Type of Cut
The tooth configuration directly influences the sharpness of the line. A blade with few teeth cuts quickly but tears fibers. A fine-toothed blade produces a clean edge but generates more heat on soft and resinous woods.
- For cross-cutting against the grain (panels, boards), a fine-toothed blade with alternating teeth provides the best surface finish.
- For ripping along the grain (longitudinal cuts), a blade with fewer teeth and flat teeth better evacuates chips and reduces the risk of jamming.
- For laminated materials or melamine, a specific blade with trapezoidal teeth limits chipping of the coating.
Using the right blade for the right material does not compensate for poor guidance, but good guidance with an unsuitable blade will leave an edge that needs to be planed or sanded. The two parameters work together.
The straightness of a cut with a circular saw relies more on preparatory actions than on the cutting action itself. Adjusting the depth, securing a straight guide, checking the guard, and clearing the cut line are four actions that each take less than a minute. On a job site or in a workshop, this preparation time is fully recovered by eliminating touch-ups and wasted pieces.